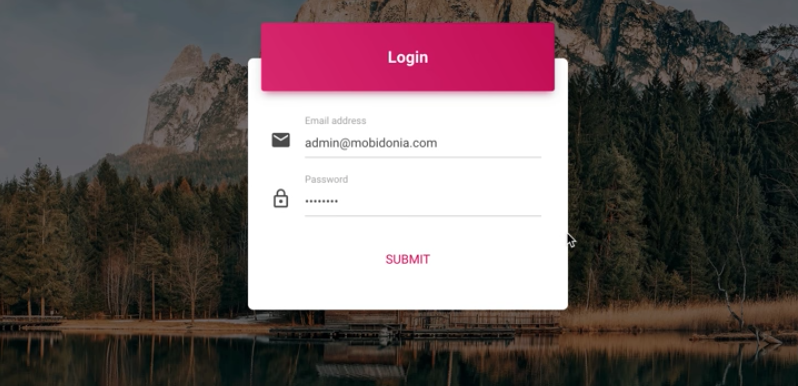
Create Firebase account
In this step you will connect your Firebase instance with the FireAdmin Panel.
To get your connection detail go in Firebase Console. If you don't have account, register new one and create new app. Go inside your app and from the Overview->Project Settings click on Add Firebase to your web app
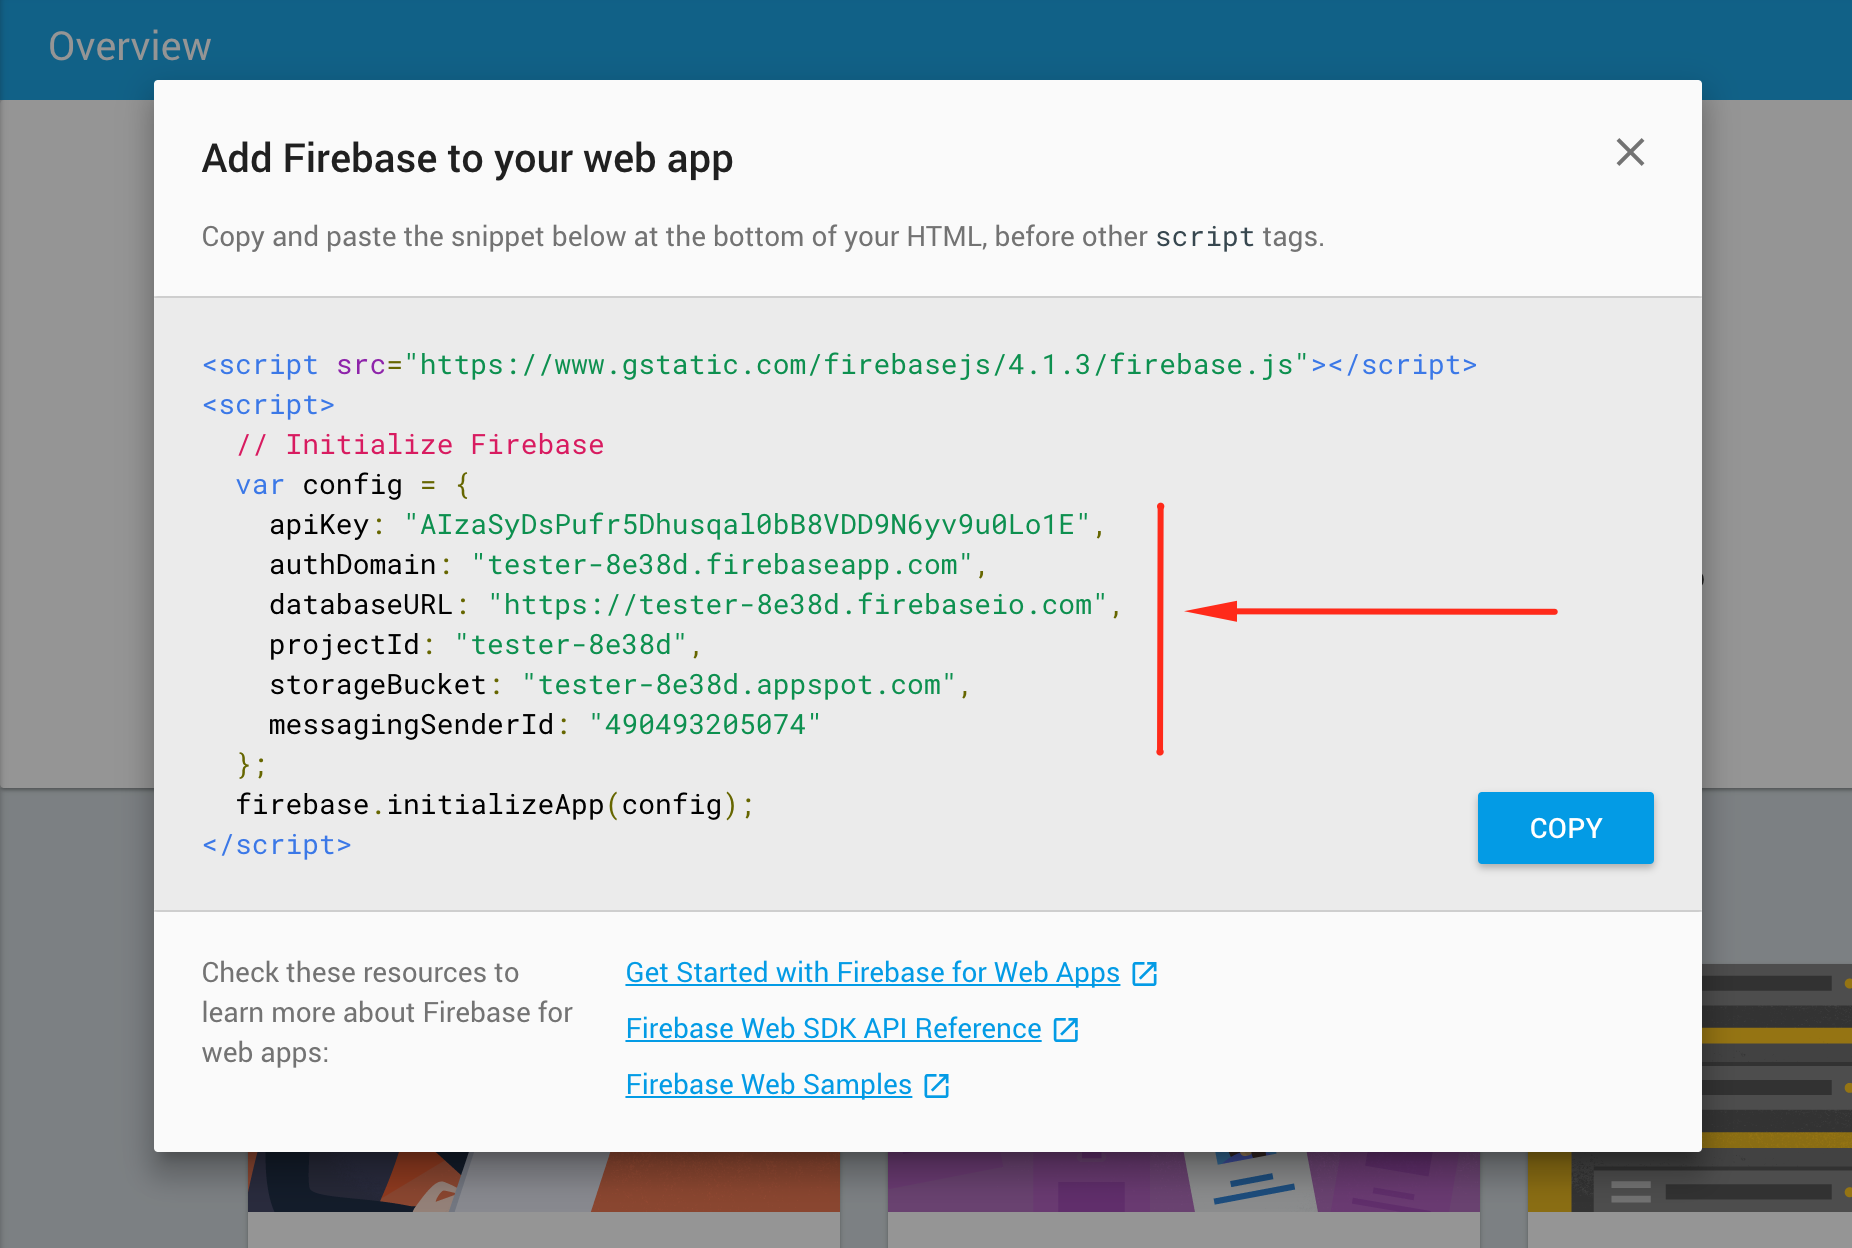
Copy the config element content and paste in "src/config/app.js" in the firebaseConfig variable, in the source code you got from CodeCanyon
Now in order to be able to login, add user with email in "Authentication"
Create the real time database
Go to Database and then click on the button called "Create database"

After clicking on the button it should appear a window that will ask you about security rules. Click on the Start in test mode and after that click Enable.
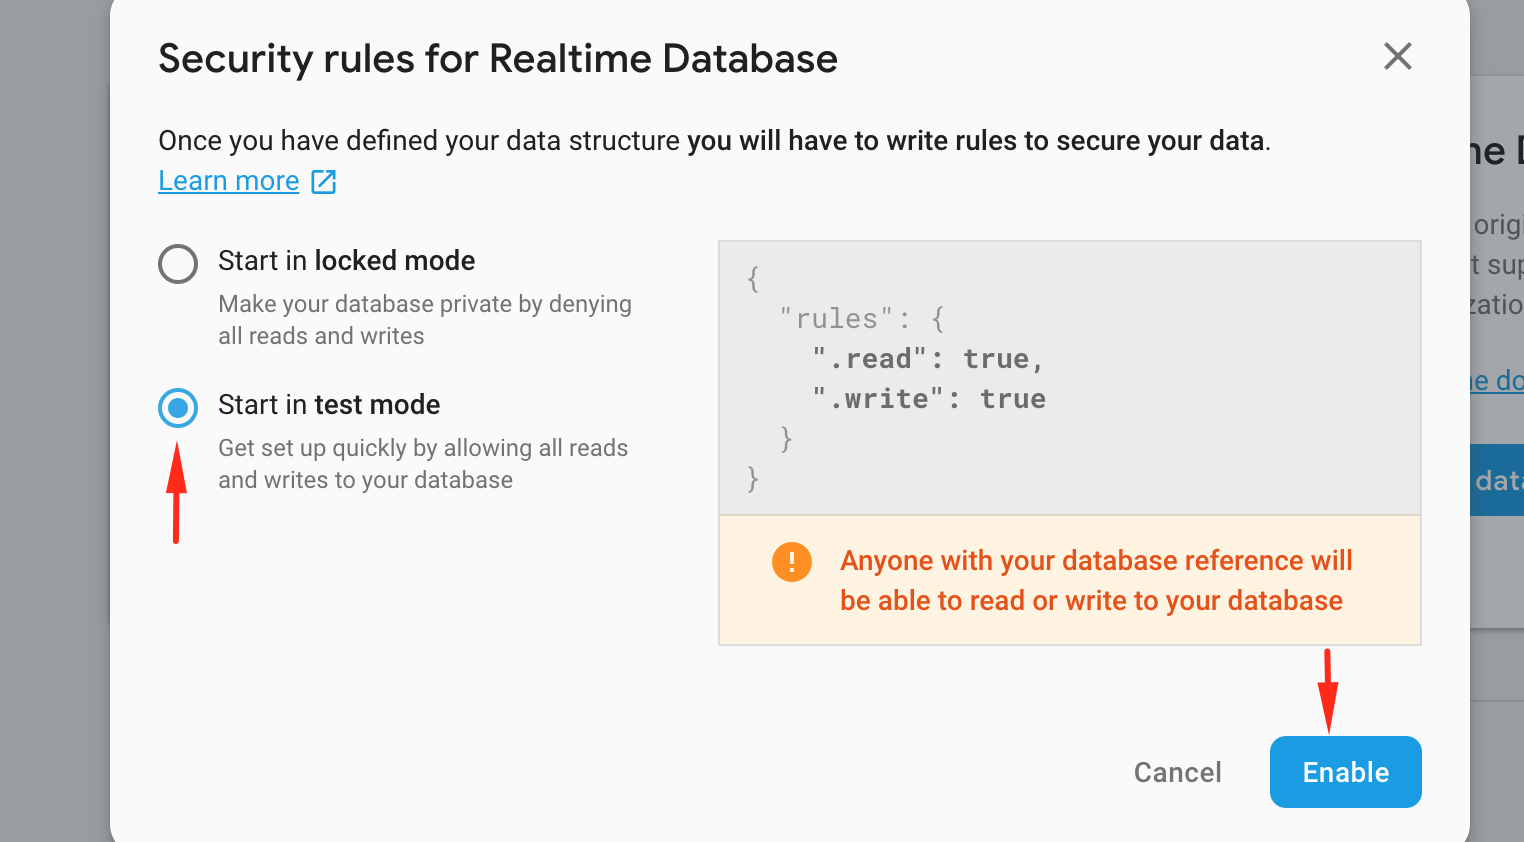
With rules configured like this everyone can read and write in your database. This is ok for test and development purposes.
But for production, this is a good starting point. This will allow edit and write to all registered users.
{
  "rules": {
    ".read": "auth !== null",
     ".write": "auth !== null"
  }
}
Create Firestore Database
Go in Databases ->Cloud Firestore

Then, a pop up will appear.
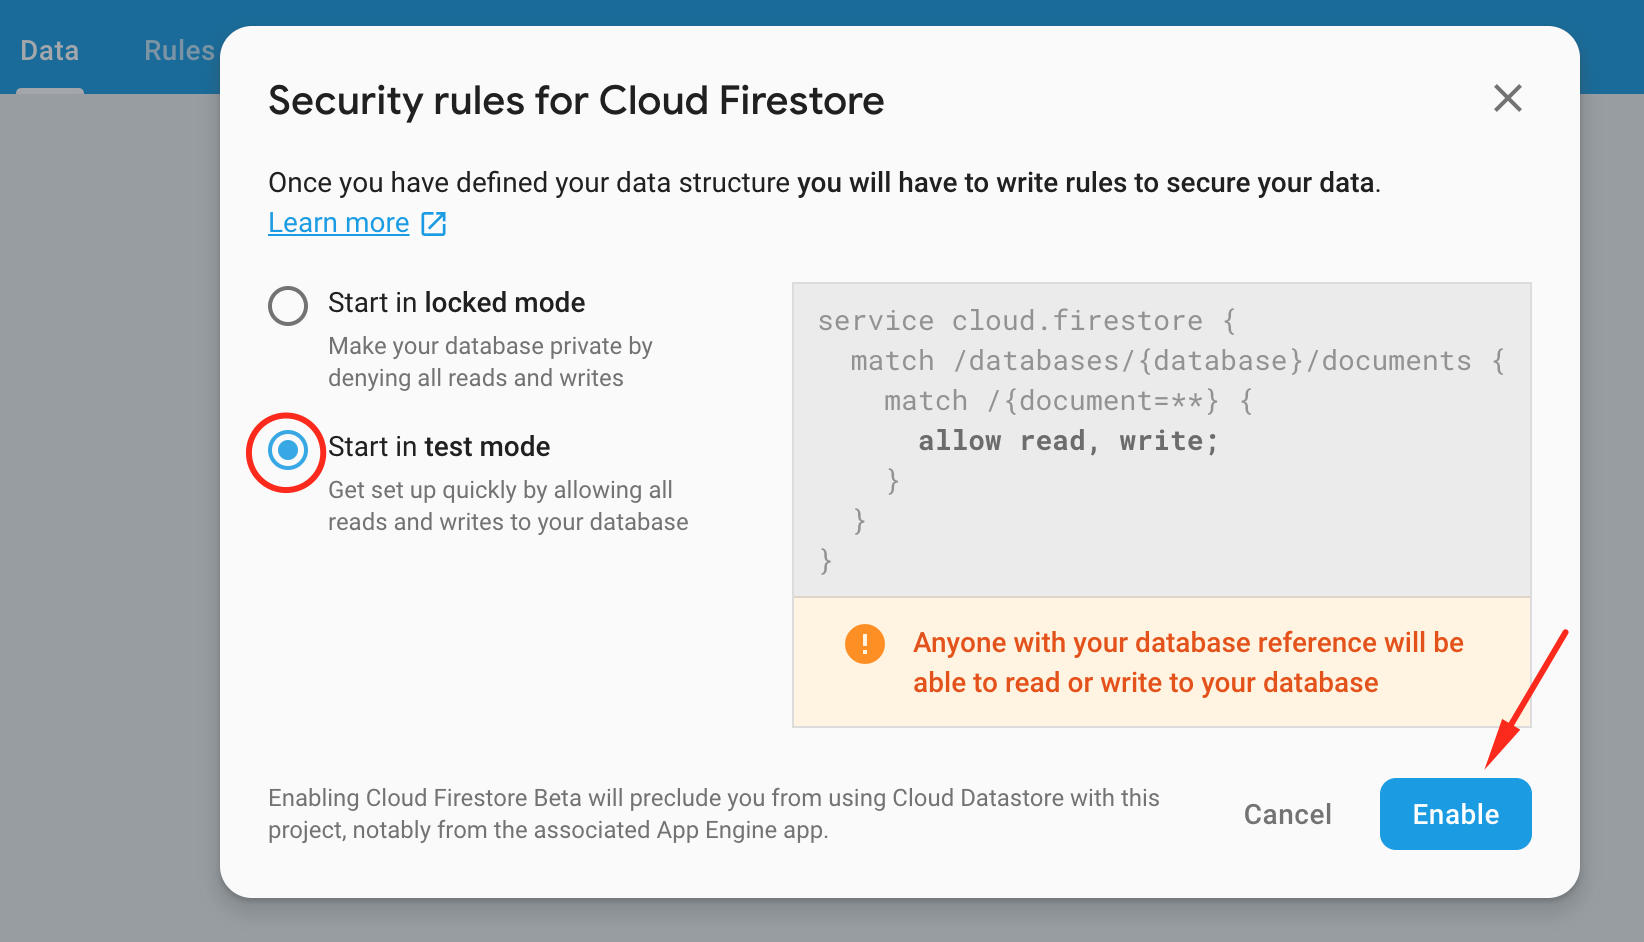
For now, use Start in test mode.
Start your app builder locally
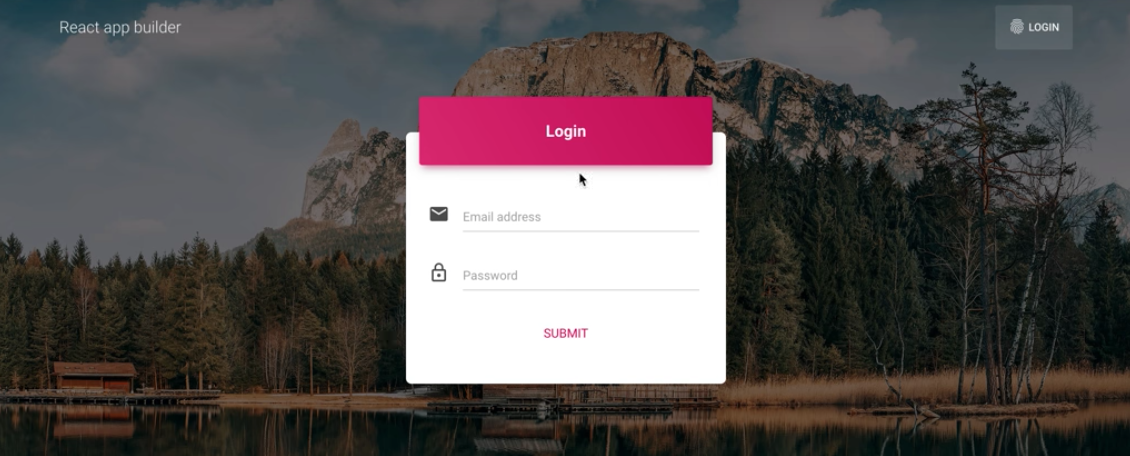
In your project opened in the terminal or command line run the command npm start. After running this command in your browser you should see a newly opened window looking like this one like in the picture below.
Create a user in Firebase
After this you should create a user in firebase for been able to login to your the app builder.
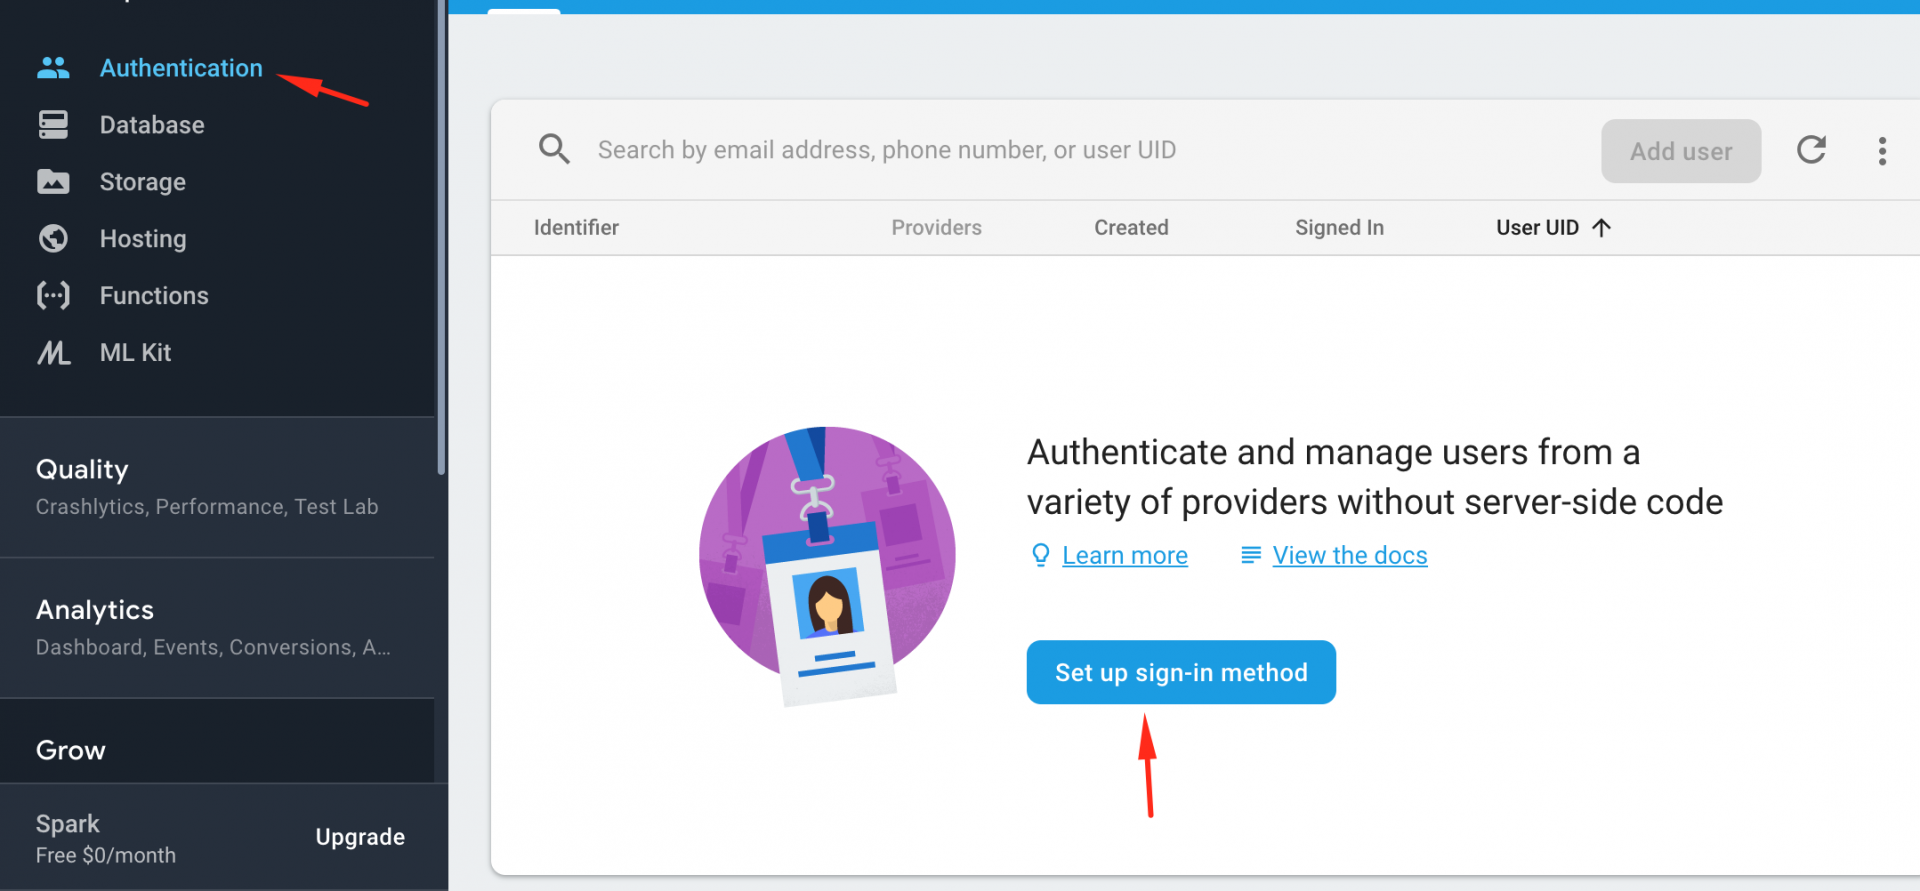
Go into firebase console and click on Authentication and after that click on Set up sign-in method
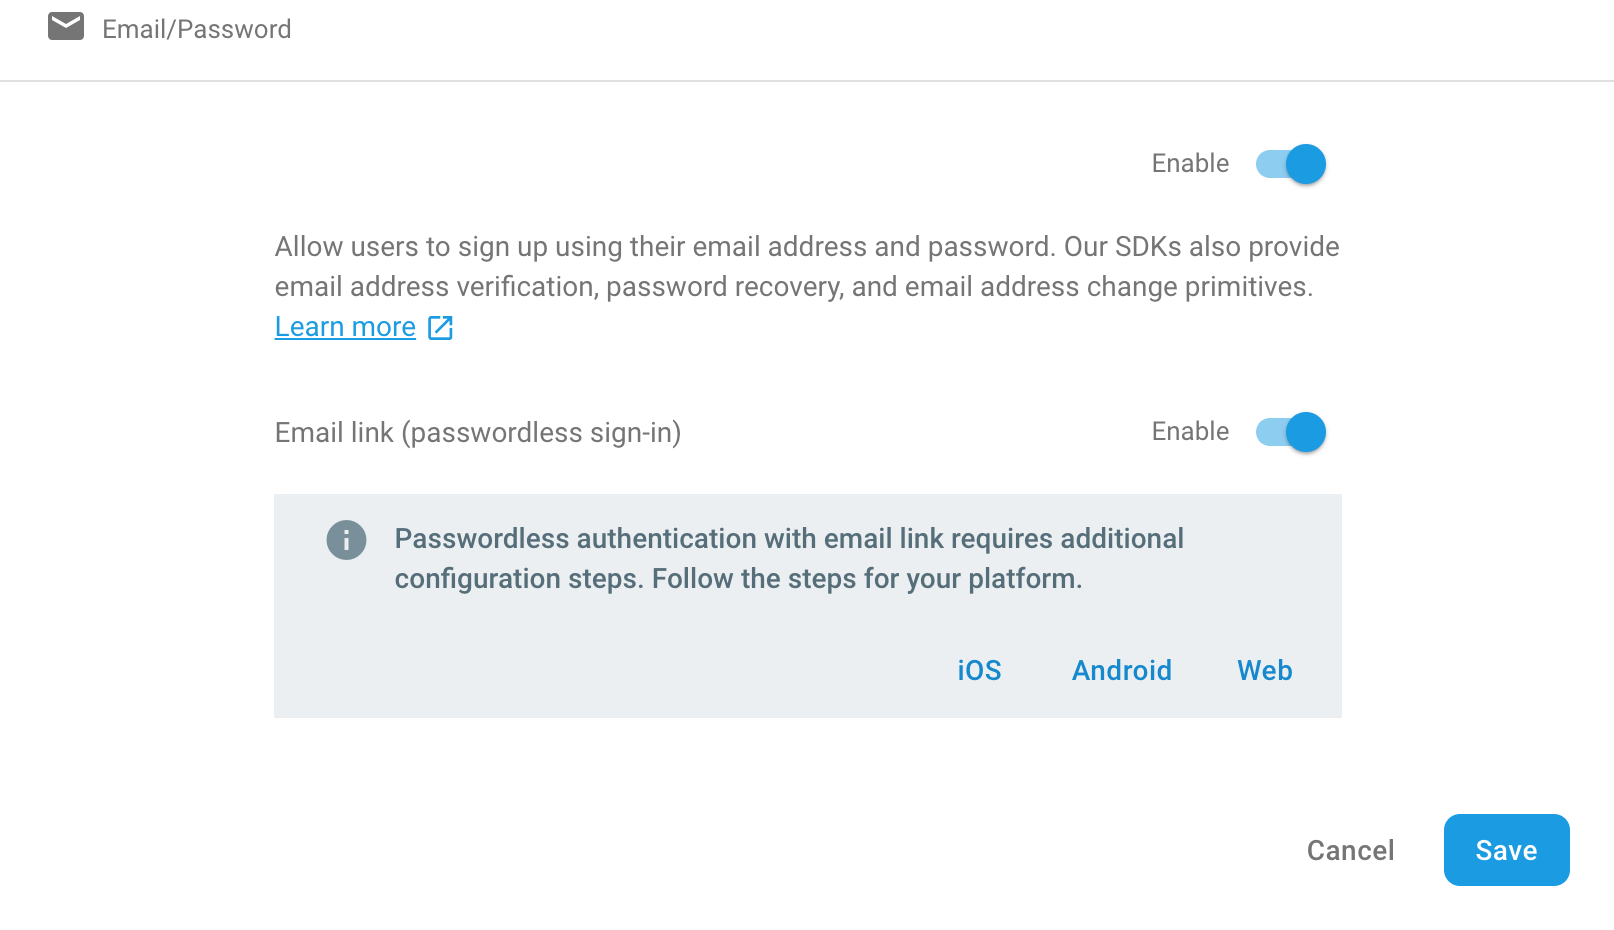
Click on Email/Password and enable them and click Save.
Now click on Users and now you should be able to click on Add user.
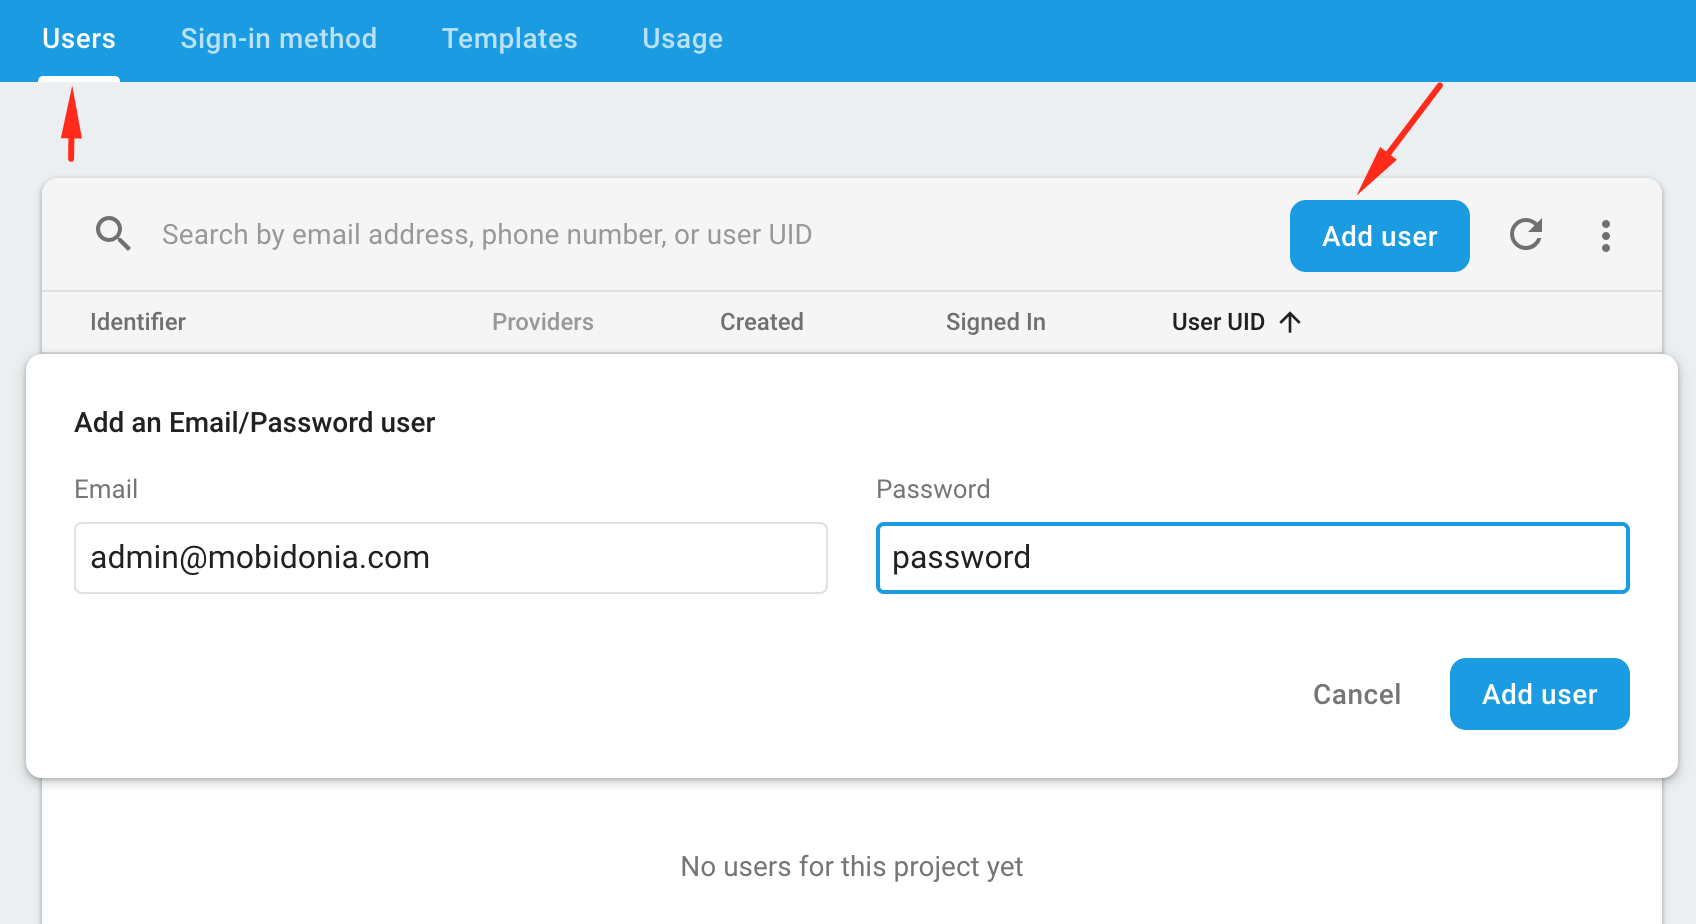
Enter your email and password click Add user.
Login to your builder whit the email and password that you added.
